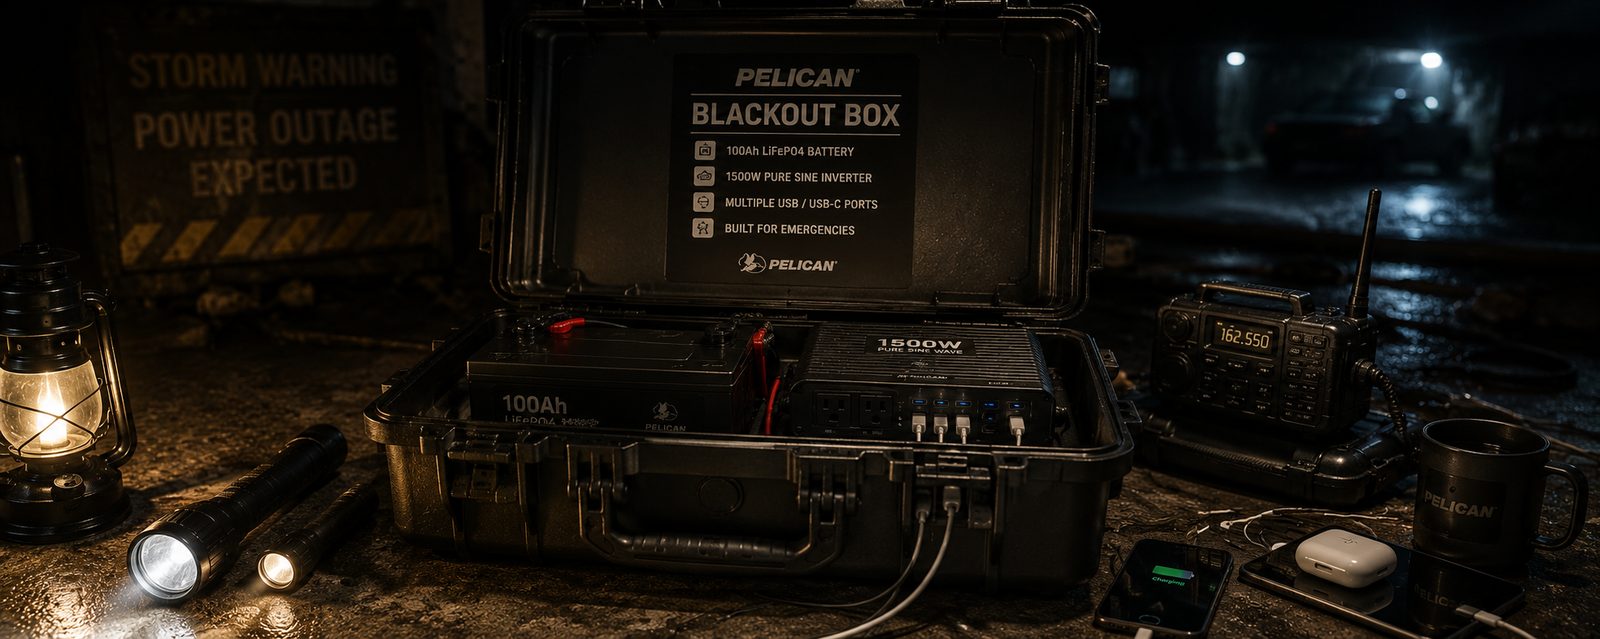
THE BLACKOUT BOX
A self-contained emergency solar power kit built inside a Pelican-style case. Your grid-down lifeline.
A self-contained emergency solar power kit built inside a Pelican-style case. Your grid-down lifeline.
A portable, self-contained emergency power system built inside a rugged case. Solar panel on top or deployable, LiFePO4 battery inside, pure sine wave inverter, USB outlets, 12V port, and LED work light. Charges phones, runs a CPAP machine, powers a radio, and keeps your critical devices alive when the grid goes dark.
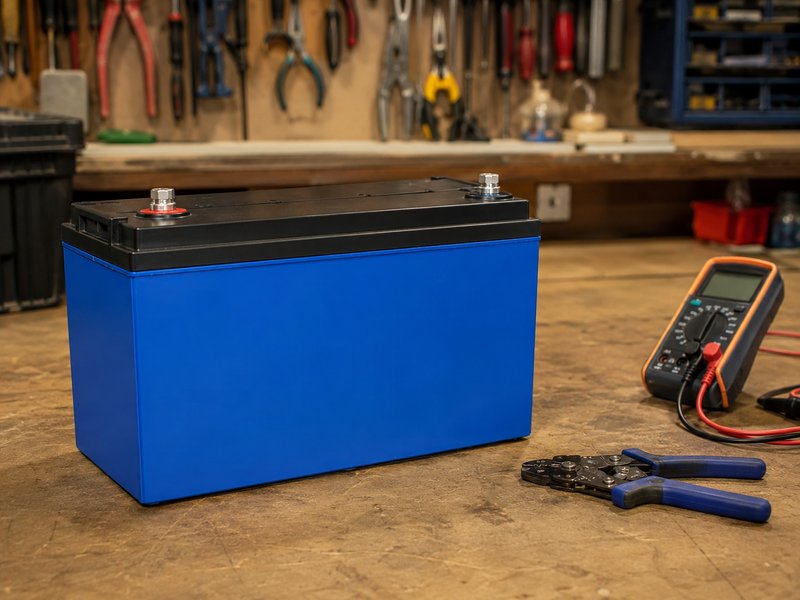
Every component links to Amazon and eBay. The total cost depends on battery size — a 50Ah LiFePO4 keeps it under $200, while a 100Ah unit with a larger inverter pushes toward $400.

Regulates solar input to safely charge the battery. MPPT extracts 15–20% more energy than PWM. Small units like the Victron 75/15 or EPEVER 10A are perfect for this scale. The LCD display lets you monitor battery voltage and charge current at a glance.
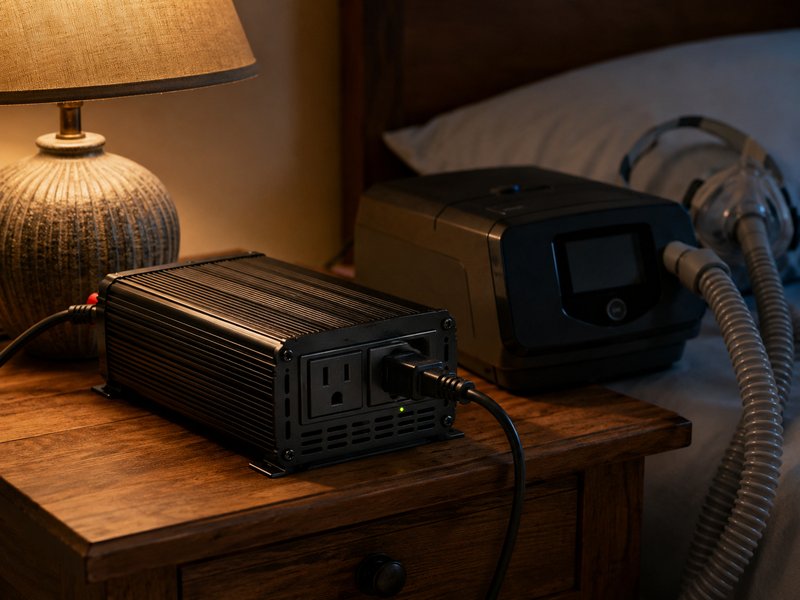
Converts 12V DC to 120V AC for standard outlets. Pure sine wave is essential for sensitive electronics and CPAP machines — modified sine wave inverters cause motor hum and can damage medical devices. 300W covers most needs; 600W adds headroom for a fan or small appliance.
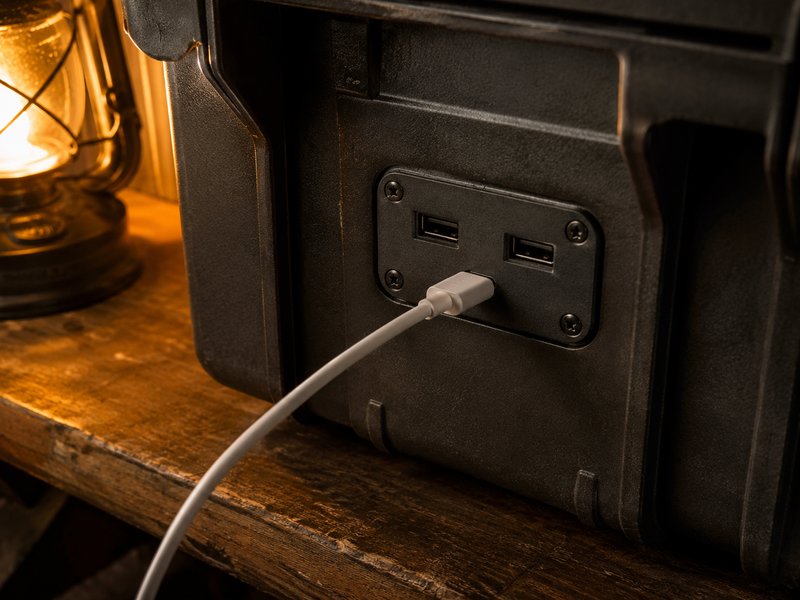
A flush-mount dual USB-A + USB-C panel gives the case clean built-in phone charging. These wire directly to 12V and bypass the inverter entirely, so they draw almost no power. Keep your family's devices alive without eating into your CPAP runtime.

Clips or magnets to the case lid. Provides bright area lighting during outages without draining much battery. Look for a 12V-direct model — no inverter needed, which means minimal power draw. One light turns the Blackout Box into your kitchen's command center.
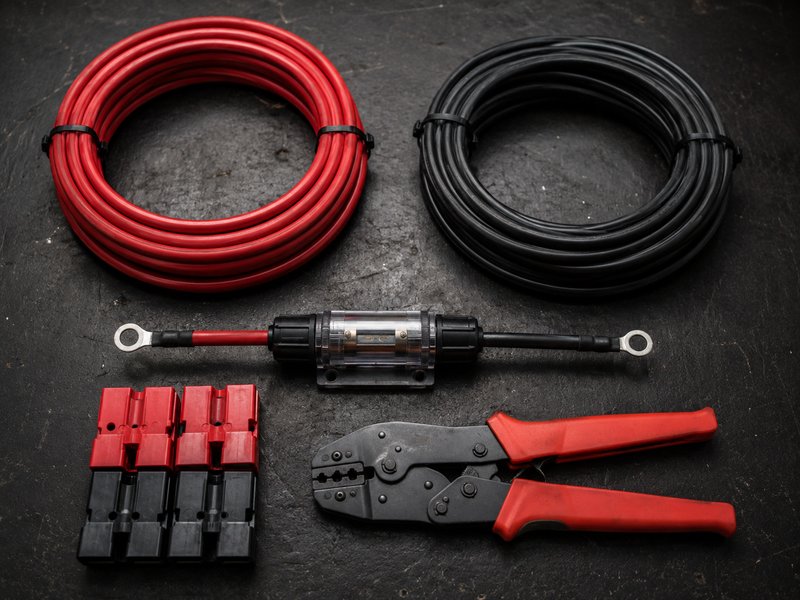
The plumbing that connects everything. 10 AWG handles the current safely at these voltages and distances. An inline fuse between battery and inverter is non-negotiable for safety. Anderson or MC4 connectors for the solar panel input give you a clean, tool-free connection.
Total build time is 2–4 hours depending on how much you customize the case. No soldering required — everything is screw-terminal or crimp-connected.
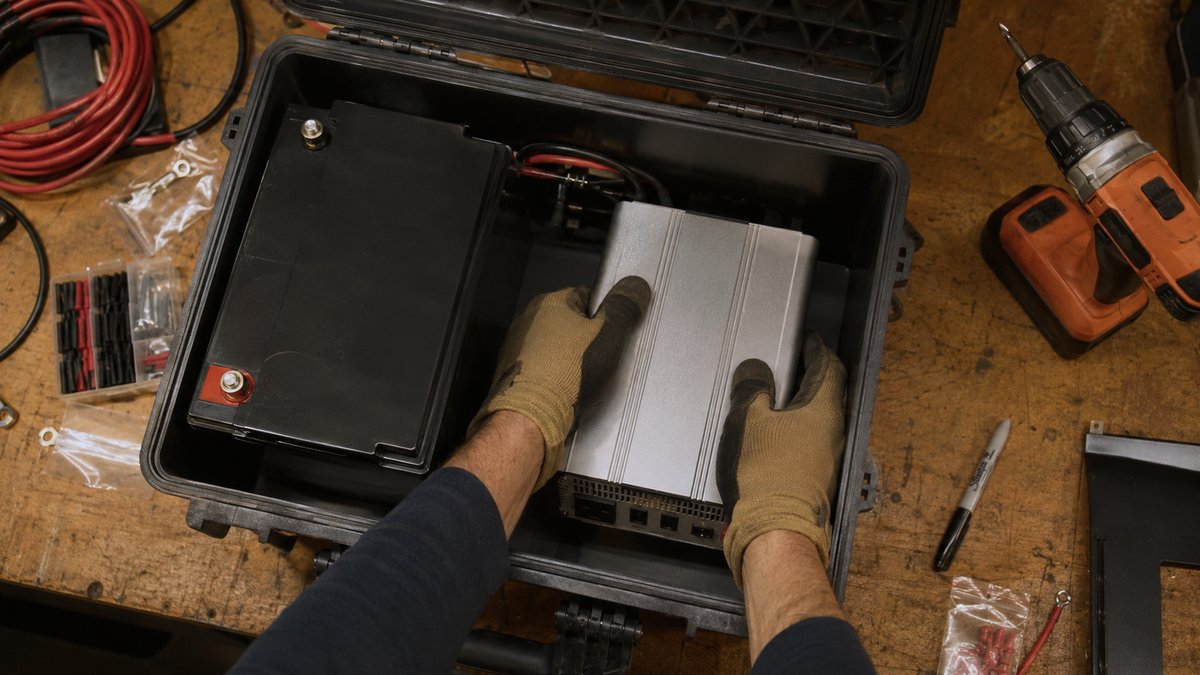
Dry-fit all components inside the case before cutting or drilling anything. Battery goes in the bottom (heaviest). Inverter beside it. Charge controller on the lid or upper wall. USB panel and 12V outlet on the front face. Leave 1–2 inches of airflow space around the inverter — it generates heat under load. Mark drill points with a marker.
Secure the LiFePO4 battery with velcro straps or L-brackets — it must not shift when carrying. Mount the inverter beside it with screws or industrial velcro. Keep the inverter's ventilation slots unblocked. Route the heavy 10 AWG cables from battery terminals to inverter input. Install the inline fuse holder on the positive cable within 6 inches of the battery terminal.
Mount the MPPT charge controller on the inner lid or a side wall. Connect battery cables (positive and negative) to the controller's battery terminals. Then connect the solar input cables — leave the connectors accessible at the case exterior (drill a grommet hole or use a waterproof panel-mount connector). Double-check polarity before connecting anything to the solar panel.
Drill mounting holes on the case front. Install the flush-mount USB panel and 12V cigarette-style outlet. Wire both directly to the battery (through a small fuse) — these run on 12V DC and do not need the inverter, which saves power. The LED work light can clip to the lid and also wire direct to 12V.
Connect the solar panel outdoors and verify the charge controller shows incoming watts. Plug a phone into the USB port. Turn on the inverter and plug in a lamp. Run a CPAP machine for 30 minutes and check battery draw on the charge controller display. If everything works, tidy up wiring with zip ties, add a label inside the lid with wiring diagram and fuse ratings, and you are storm-ready.
If the DIY route isn't your thing, a portable power station from Bluetti gives you solar charging, built-in inverter, USB ports, and app monitoring in a single unit — ready out of the box.
Browse Bluetti Power Stations →